This document serves as a reference on how to build a pipeline using the model management studio.
What you will do
- Build a pipeline using the Model Management Studio to perform a sentiment analysis comparison
The website can be found at http://modelrisk3.qusandbox.com/
- Click on the Edit button beside the pipeline name.

- A form slides down for the user to to fill in Pipeline information as shown below.

- Fill in the Details as follows:
Name: Edgar-Comparison-Pipeline
Access Role: public
Description: Comparing sentiment analysis performed using different Natural Language API's on Edgar data.
Status: active
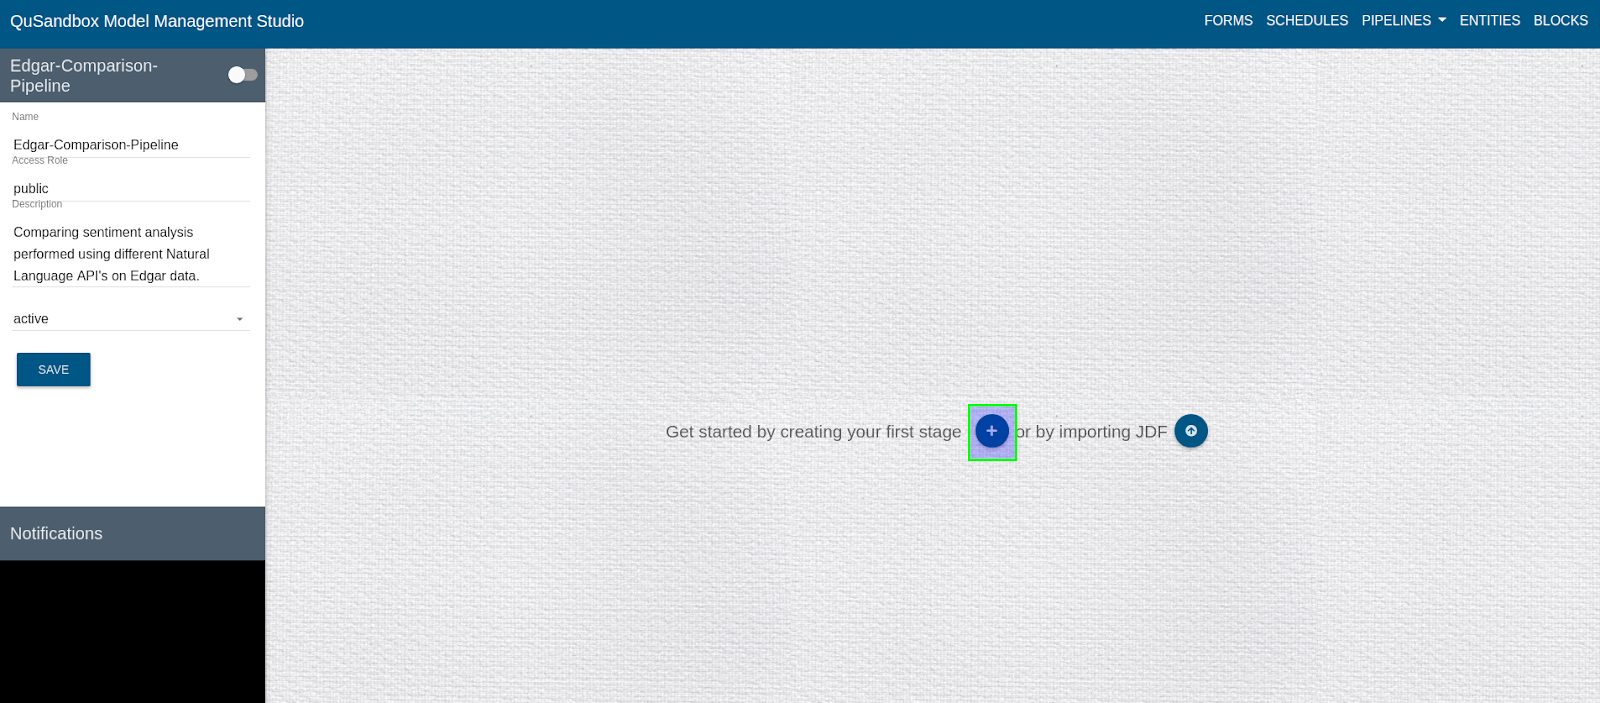
- Create a Stage, by clicking on the highlighted button.
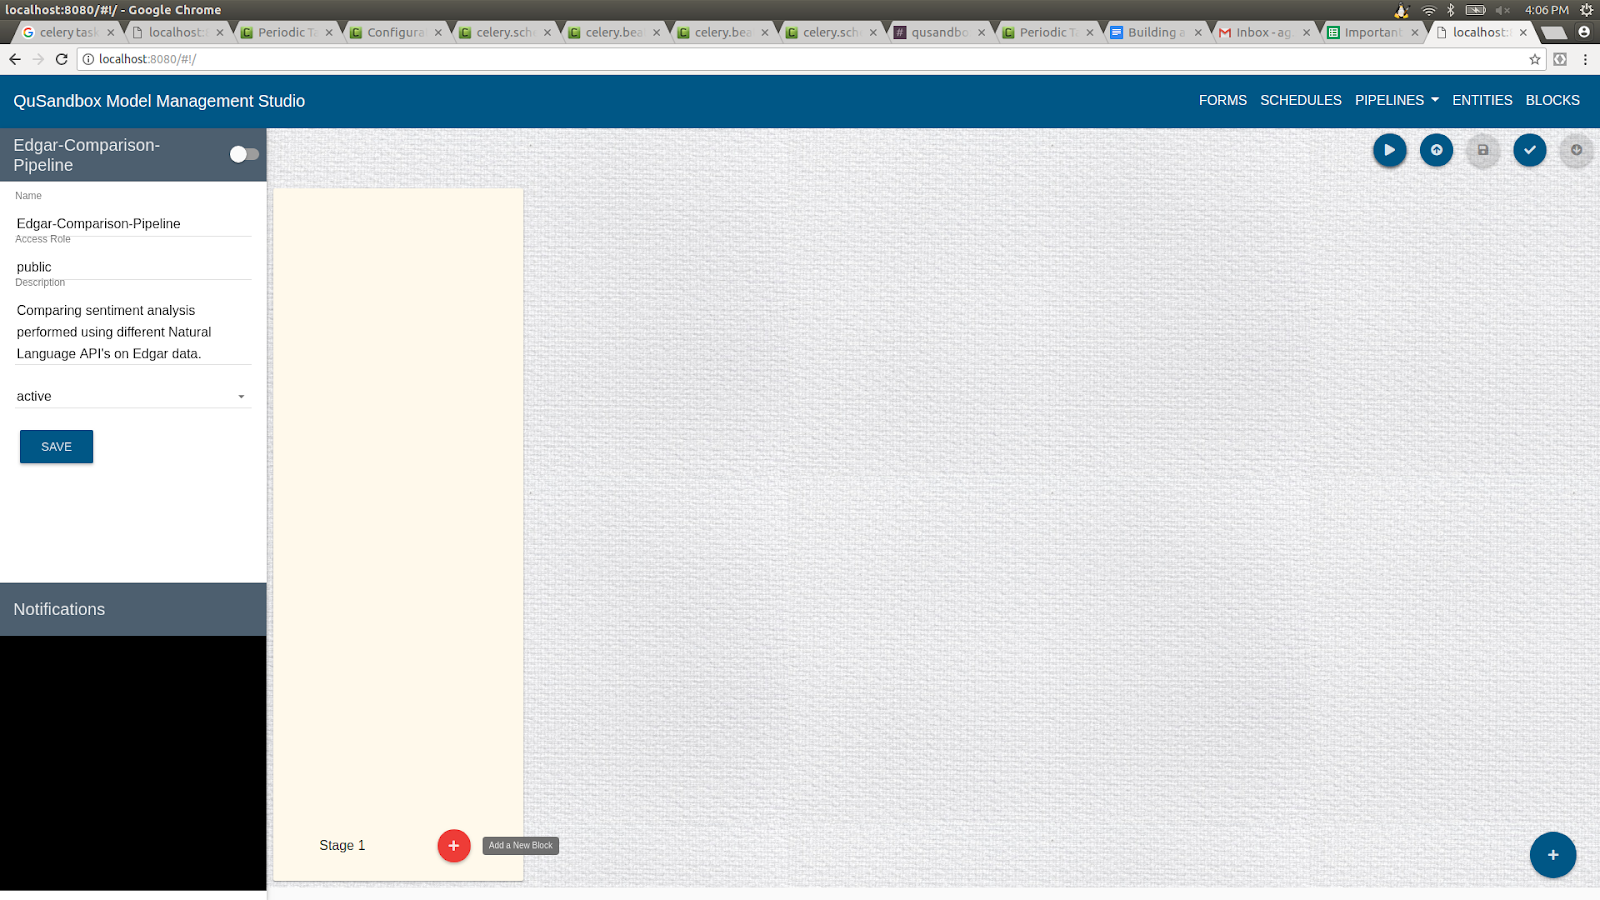
- Add a Block to the stage, by clicking the "+" button in the added stage.
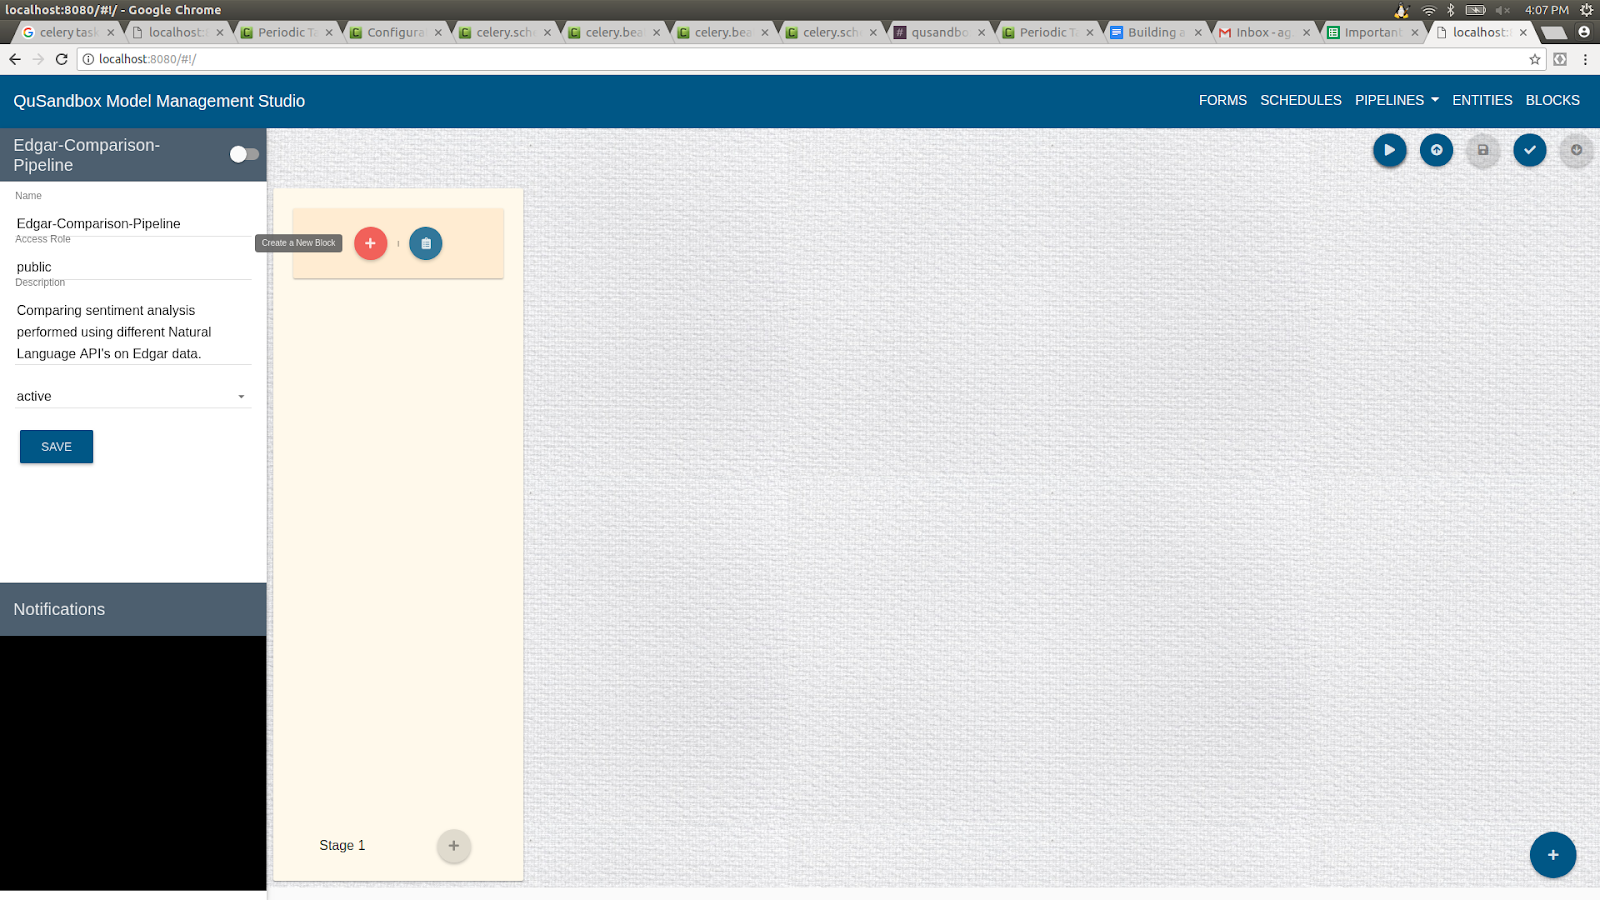
- Create a the block by clicking on the "+" button as shown below
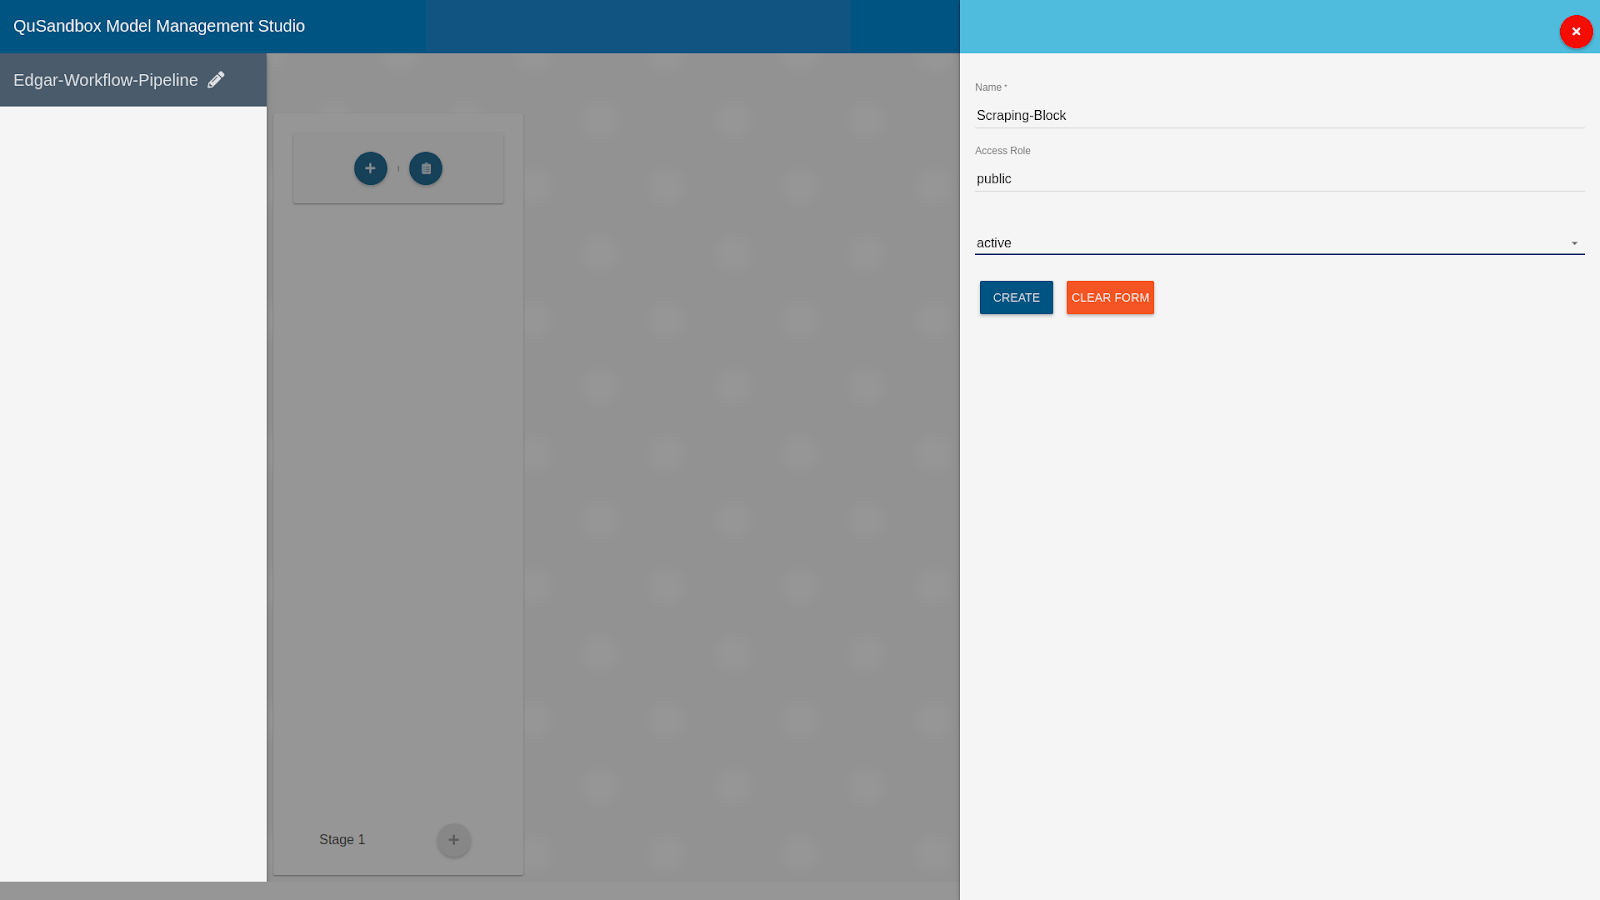
- Fill the details of the block as follows and click on "Create":
Name: Scraping-Block
Access Role: public
Current Status: active
- Once a block is added user can add entities to this block by clicking on Add Entity as highlighted below.
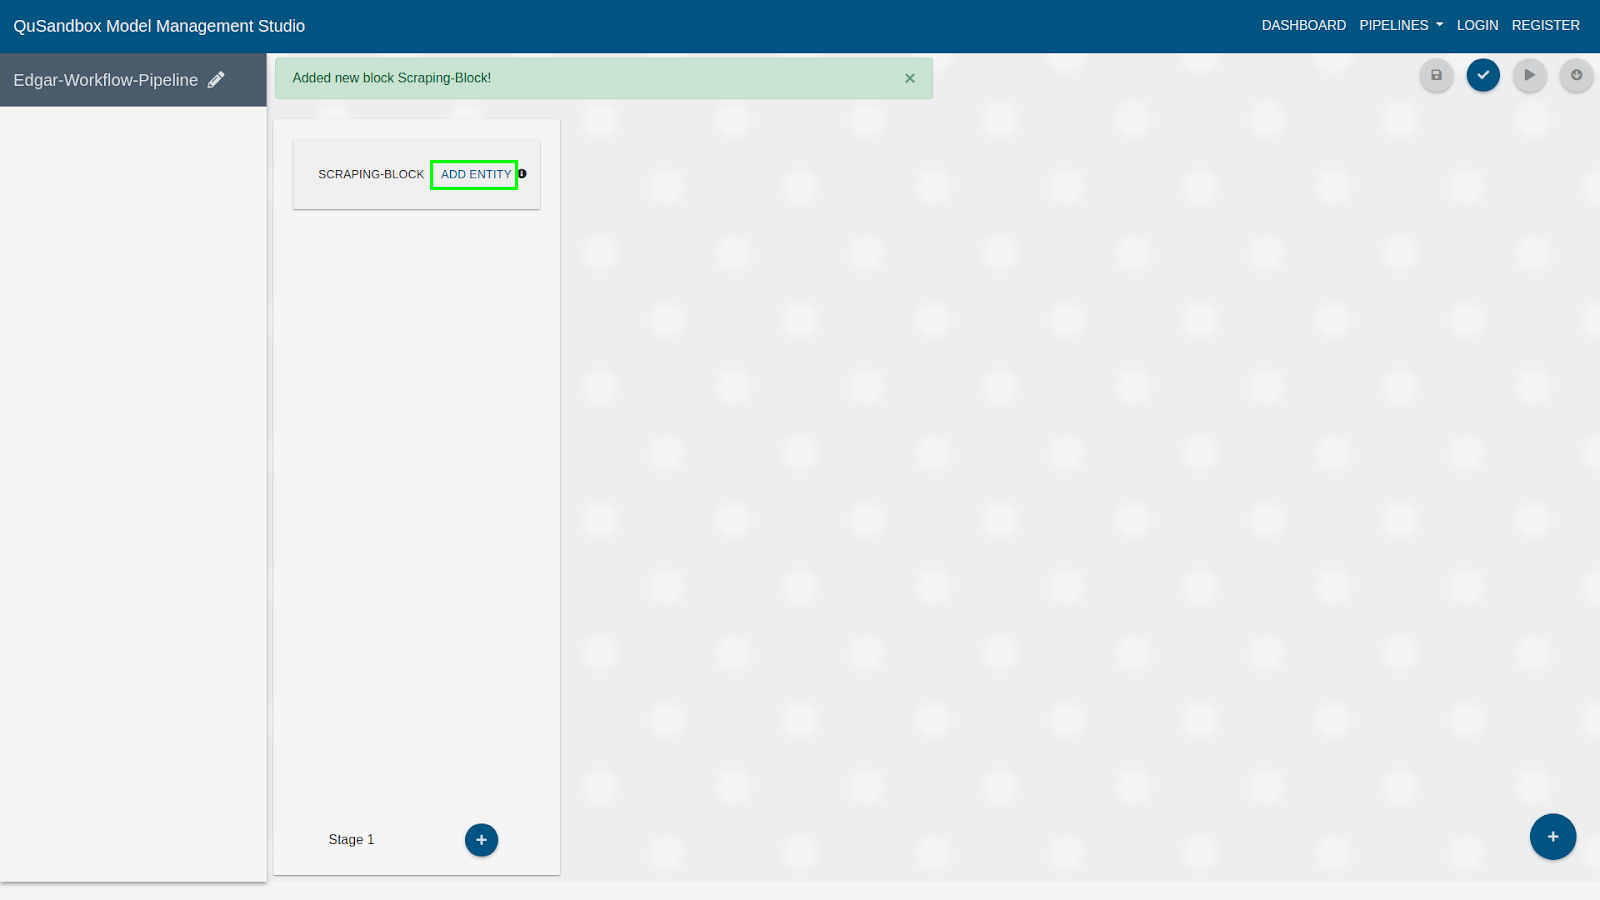
- Once an Entity is added user can create it by clicking on the "+" button as shown below.
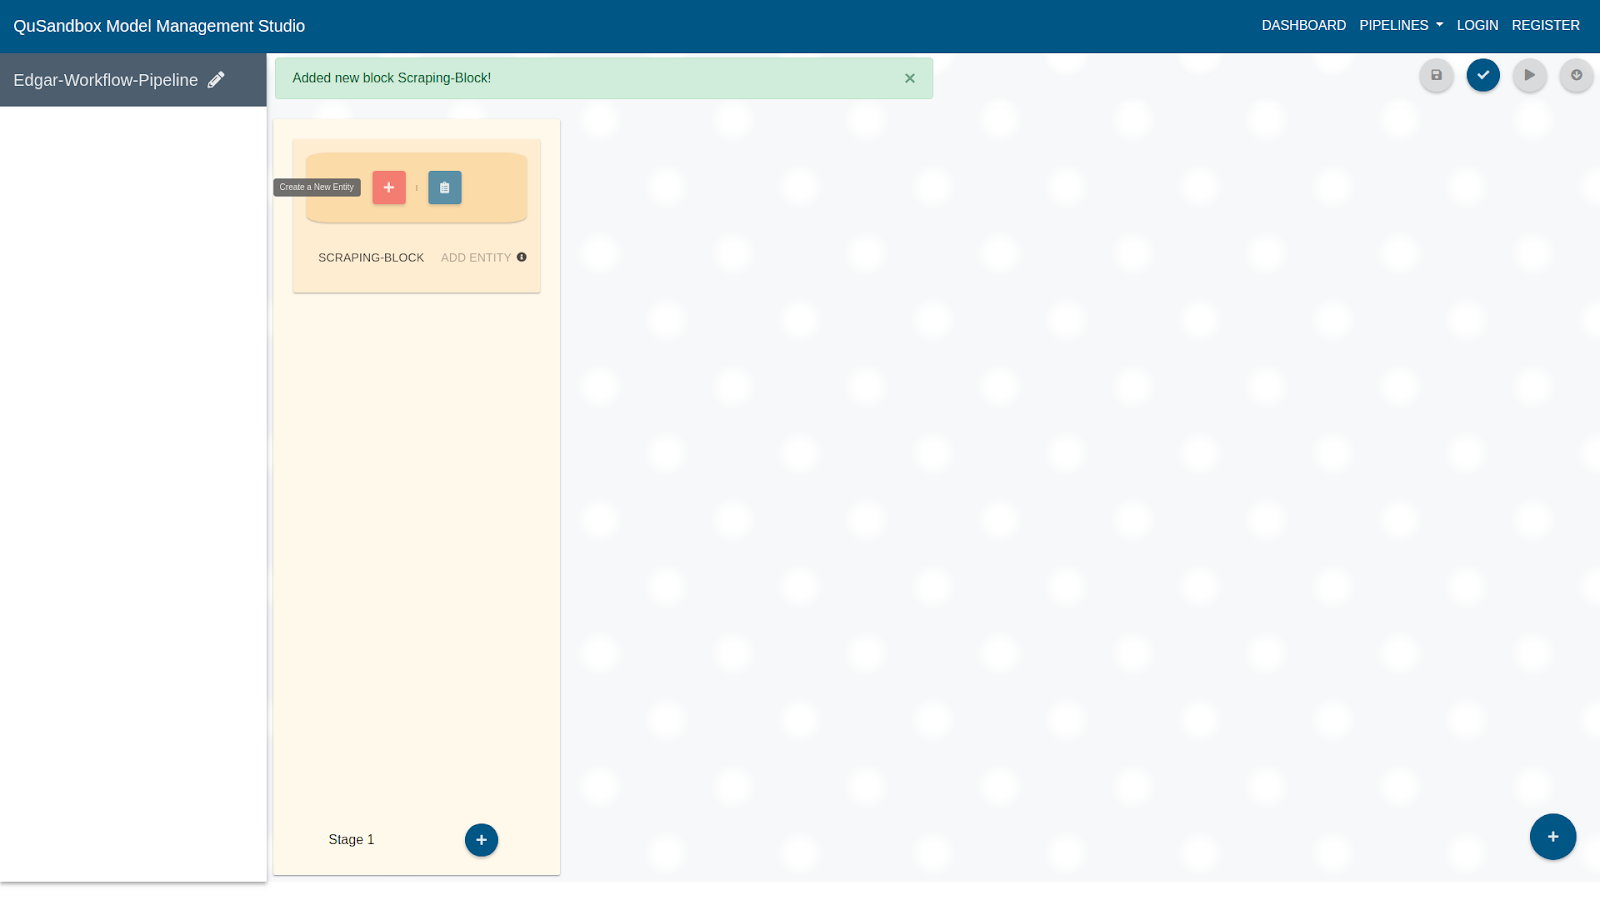
- Fill in the details of this Entity as follows:
Name: Scraping-Environment
Access Role: public
Current Status: active
Type of Entity: Environment
*Callback, Pre-execution, Post-execution and Run Command can be left blank
Type of OS: Ubuntu
Source: AWS
Duration: 1
Start From: DOCKERHUB
Dockerhub URL: jdadaptivealgo/sentiment_analysis_1
Size: t2.micro
Username: ubuntu
Single Project: True
Use Amazon Credentials: false
- Click on "Create", as shown below to add this entity to the stage.
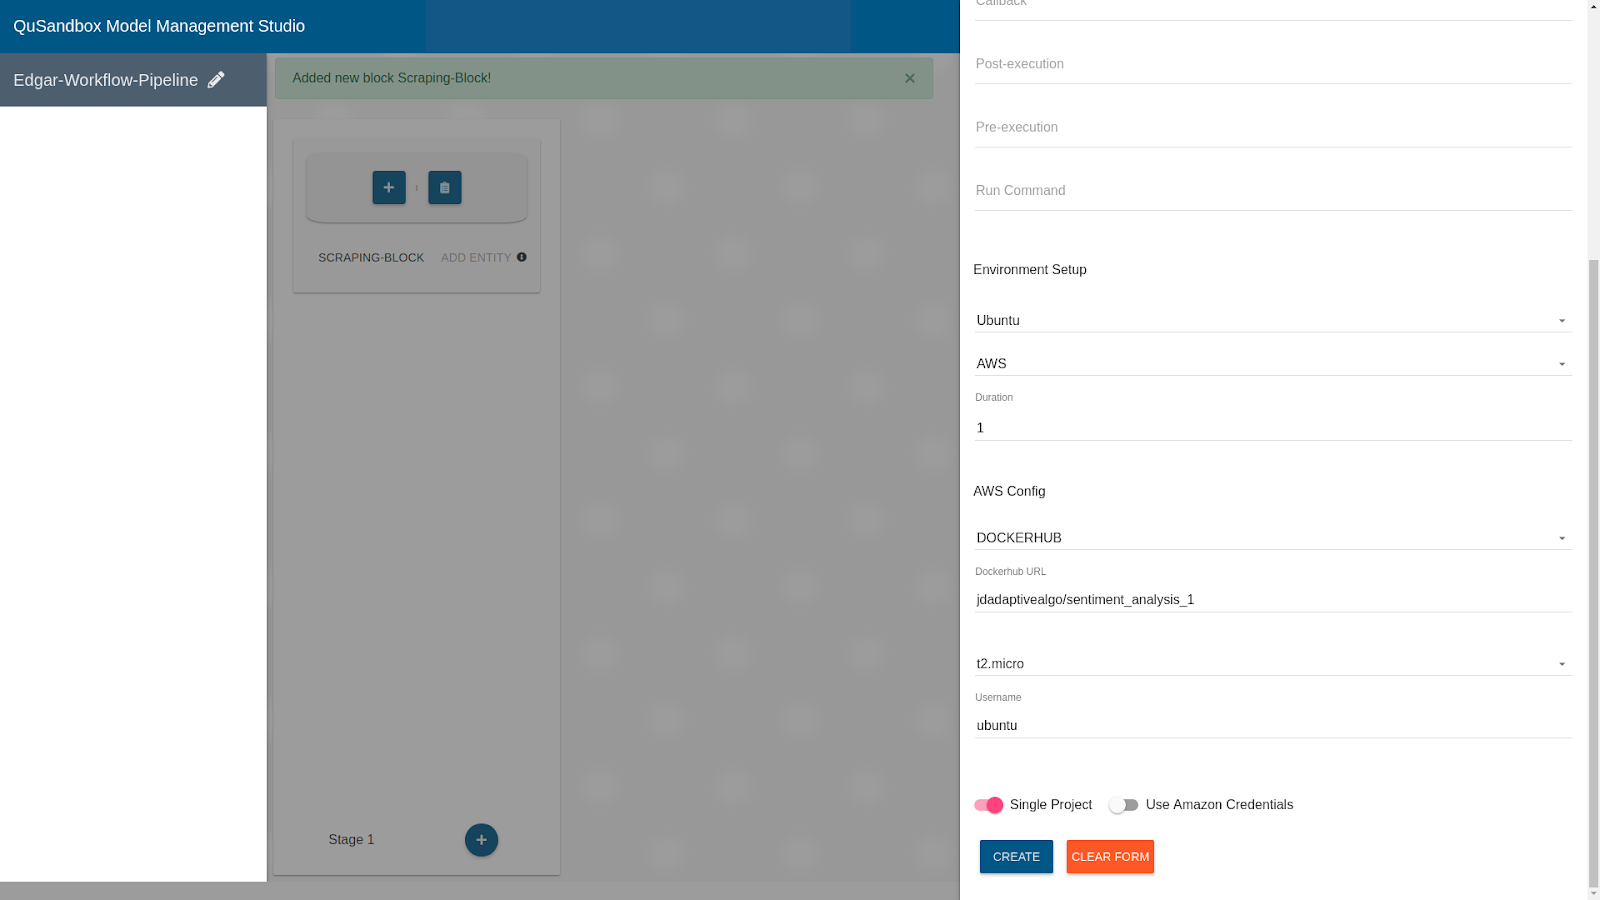
- Follow Step 5 and 6 to add another entity to this stage with the following details:
Name: Scraping-Model
Access Role: public
Current Status: active
Type of Entity: Model
Post-execution: https://raw.githubusercontent.com/hs-su2018-qu/post_execution_edgar/master/post_execution.sh
*The above script finds a run.sh and executes it in the docker container
Parameters: Add parameters as required such as:
AMAZON_ACCESS_KEY
AMAZON_SECRETACCESS_KEY
AMAZON_REGION_NAME
S3_FOLDER
BUCKET_NAME
*Callback, Pre-execution and Run Command can be left blank
Source Type: QuSandbox
Select Image: sentiment_analysis_scraping1530543528937
- Add another stage following the same steps in the previous section.
- Add a Block to the stage, with the following information:
Name: Data-Processing-Block
Access Role: public
Current Status: active
- Create an Entity of type environment with the following details:
Name: Data-Processing-Environment
Access Role: public
Current Status: active
Type of Entity: Environment
*Callback, Post-execution, Pre-execution and Run Command can be left blank
Type of OS: Ubuntu
Source: AWS
Duration: 1
Start From: DOCKERHUB
Dockerhub URL: jdadaptivealgo/sentiment_analysis_2
Size: t2.micro
Username: ubuntu
Single Project: True
Use Amazon Credentials: false
- Create an Entity to set up the Model for data processing with the following details:
Name: Data-Processing-Model
Access Role: public
Current Status: active
Type of Entity: Model
Post-execution: https://raw.githubusercontent.com/hs-su2018-qu/post_execution_edgar/master/post_execution.sh
*Callback, Pre-execution and Run Command can be left blank
Parameters: Add parameters as required such as:
AMAZON_ACCESS_KEY
AMAZON_SECRETACCESS_KEY
AMAZON_REGION_NAME
S3_FOLDER
BUCKET_NAME
Source Type: QuSandbox
Select Image: sentiment_analysis_pre_processing1530543608233
- Add a new stage as in the previous sections.
- Add a Block to the stage, with the following information:
Name: Sentiment-Analysis-Block
Access Role: public
Current Status: active
- Create an Environment Entity with the following details:
Name: Sentiment-Analysis-Environment
Access Role: public
Current Status: active
Type of Entity: Environment
*Callback, Post-execution, Pre-execution and Run Command can be left blank
Type of OS: Ubuntu
Source: AWS
Duration: 1
Start From: DOCKERHUB
Dockerhub URL: jdadaptivealgo/sentiment_analysis_3_latest
Size: t2.micro
Username: ubuntu
Single Project: True
Use Amazon Credentials: false
- Create a QuSandbox Model entity with following details:
Name: Sentiment-Analysis-Model
Access Role: public
Current Status: active
Type of Entity: Model
*Callback, Post-execution, Pre-execution and Run Command can be left blank
Parameters: The below parameters need to be added. They could be encoded for security reasons
DATA_SOURCE_URL
AZURE_KEY
AMAZON_ACCESS_KEY
AMAZON_SECRETACCESS_KEY
AMAZON_REGION_NAME
S3_FOLDER
BUCKET_NAME
GOOGLE_KEY
WATSON_KEY
Source Type: QuSandbox
Select Image: sentiment_analysis_stage3_script1533155869827
- Add a new stage as in the previous sections.
- Add a Block to the stage, with the following information:
Name: API-Comparison-Block
Access Role: public
Current Status: active
- Create an Environment Entity with the following details:
Name: API-Comparison-Environment
Access Role: public
Current Status: active
Type of Entity: Environment
*Callback, Post-execution, Pre-execution and Run Command can be left blank
Type of OS: Ubuntu
Source: AWS
Duration: 1
Start From: DOCKERHUB
Dockerhub URL: jdadaptivealgo/sentiment_analysis_4_final
Size: t2.micro
Username: ubuntu
Single Project: True
Use Amazon Credentials: false
- Create a QuSandbox Model entity with following details:
Name: API-Comparison-Model
Access Role: public
Current Status: active
Type of Entity: Model
*Callback, Post-execution, Pre-execution and Run Command can be left blank
Parameters: The below parameters need to be added. They could be encoded for security reasons
S3_BUCKET_URL
S3_FOLDER
Source Type: QuSandbox
Select Image: sentiment_analysis_stage41533147717002
- To save a pipeline the user needs to first validate the pipeline by clicking on the "Validate" button as highlighted below.
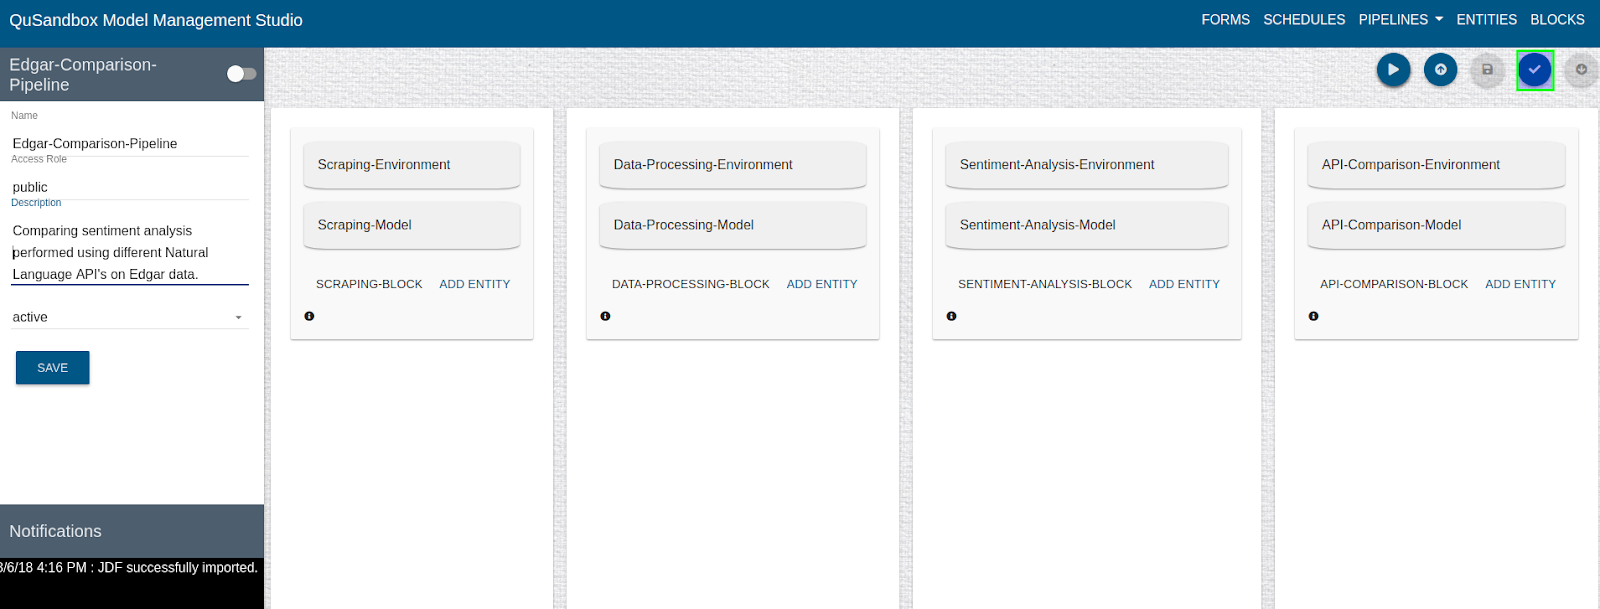
- Once validated user can save this pipeline by clicking on the "Save" button as shown below.

- Once a pipeline is ready, click on the verify button and then click on the Run button as highlighted below.
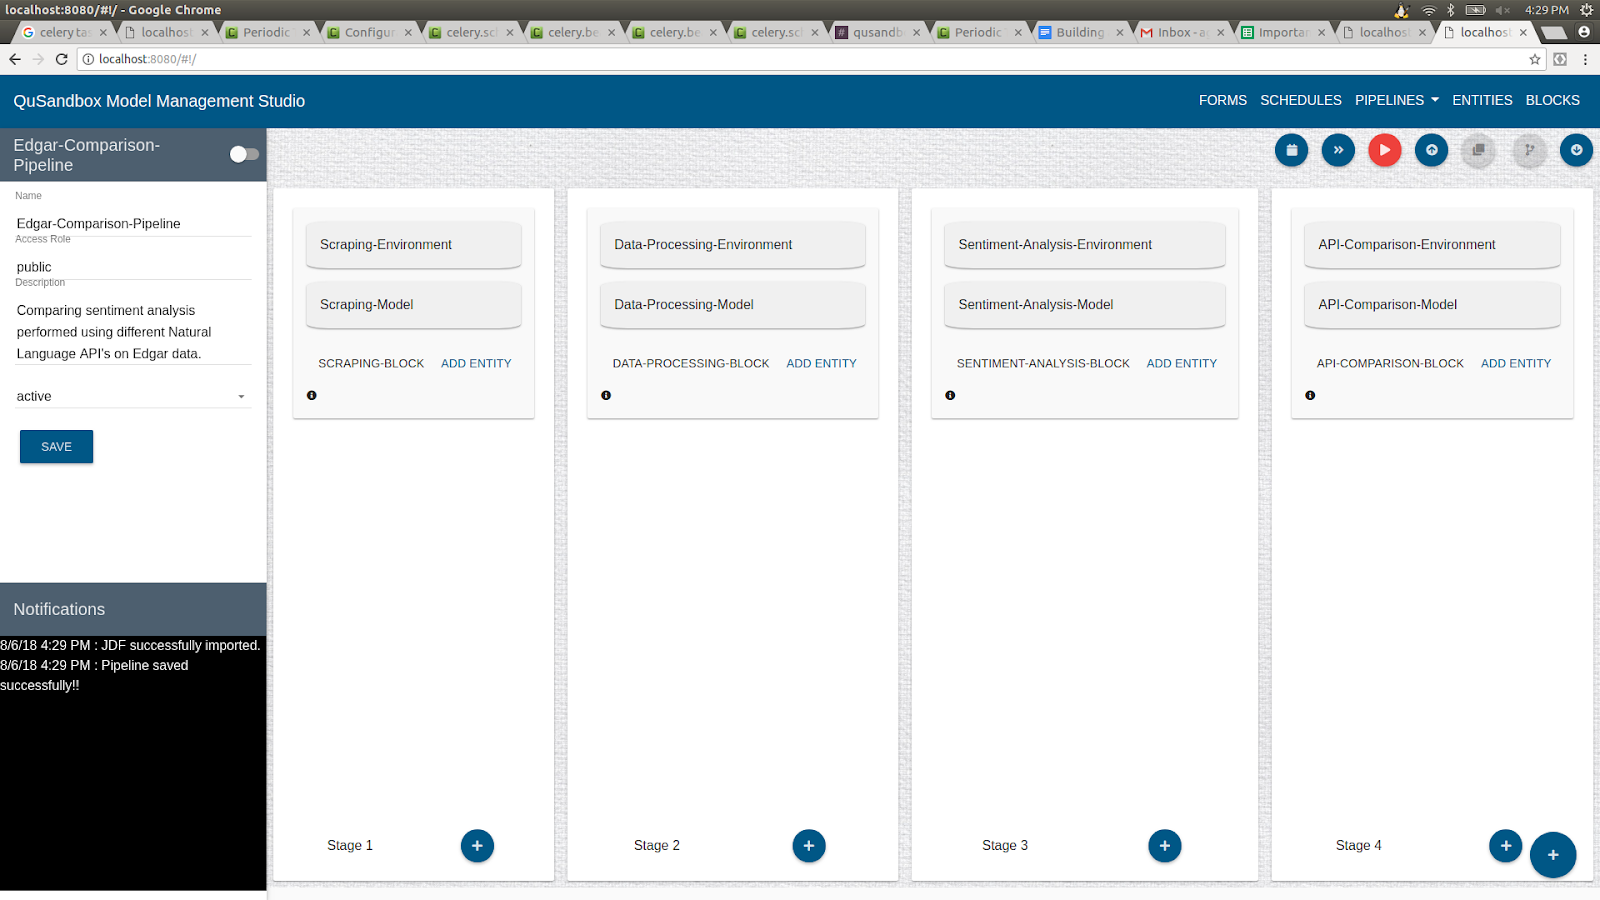
- Clicking on the Run button gives option to run the Pipeline "Now" or on a "Schedule".
- Click on Run Now Button or Click on "Schedule" gives a list of schedules to attach to the pipeline. Once the "Select Schedule" button is clicked the schedule will be attached to the pipeline.
- Run Now will pop up the status window.
- Users can also go to Running Pipelines View under the Pipelines in the header to view the status.
- Each stage in the pipeline is represented by a tab in the status dialog.
- Once the status of a stage is completed the next stage Tab becomes available, for the user to view.