Welcome! QuForecast is a time series forecasting service. It uses Gluonts to forecast univariate series. For further information on Gluonts, please refer to https://ts.gluon.ai/master/index.html.
The interface is divided into the main screen and the sidebar. For configuration and workflows, use the sidebar, and the results will be displayed in the main screen.
The workflow is as follows:
- Choose Step. Choose among "Step 1: Choose dataset", "Step 2: Train" and "Step 3: Forecast". A complete workflow includes performing these three steps sequentially. Currently, there is only one demo dataset, which will be automatically loaded when launching the project. Without specifying a trained model, the forecast will not be done;
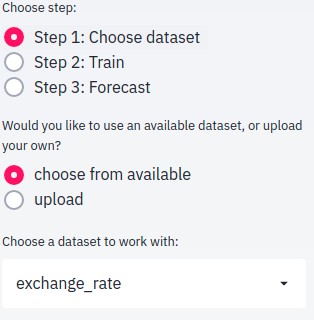
- In step 1: Choose a dataset, choose among datasets provided by Gluon, or upload a dataset.
Two dataset sources are provided: choose among gluonts-provided datasets, or upload a .csv following the format requirements.
Currently, there is only one demo dataset provided here, which is exchange_rate.
As for uploading, please follow this format: in the CSV file, the first column should be timestamps(dates, hours, etc. following pandas-readable format). The first row should be feature names. Currently, the system supports univariate forecasting, so only one data column will be used. A selection dropdown will be provided once the dataset is uploaded.

- (Optional) If the dataset is user-uploaded, specifications are required before the dataset can be used by Gluon.
The requirements for a custom dataset are to be iterable, have a "target" and a "start" field, and a frequency. Below is an example:
N = 10 # number of time series
T = 100 # number of timesteps
prediction_length = 24
freq = "1H"
custom_dataset = np.random.normal(size=(N, T))
start = pd.Timestamp("01-01-2019", freq=freq) # can be different for each time series
from gluonts.dataset.common import ListDataset
# train dataset: cut the last window of length "prediction_length", add "target" and "start" fields
train_ds = ListDataset([{'target': x, 'start': start}
for x in custom_dataset[:, :-prediction_length]],
freq=freq)
# test dataset: use the whole dataset, add "target" and "start" fields
test_ds = ListDataset([{'target': x, 'start': start}
for x in custom_dataset],
freq=freq)
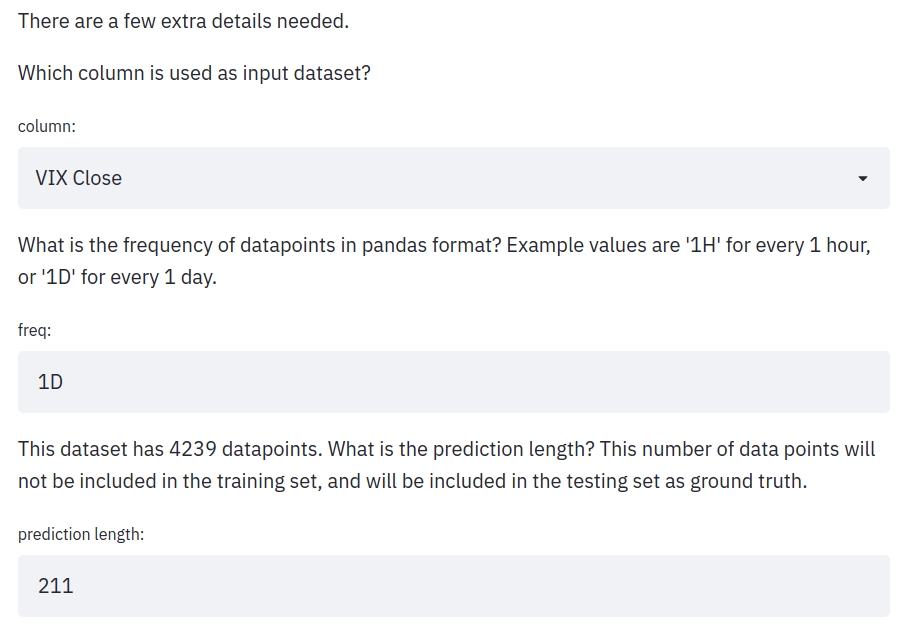
QuForecast will ask for input on 3 things: the data column to select, the frequency and the prediction length.
For the data column, currently the system supports univariate forecasting, one column is selected.
For the frequency, this is the time difference between two data points. It can be a day, an hour, 5 minutes, etc. This field only takes pandas-acceptable formats.
For the prediction length, this is the length of data that would be cropped out during training and only used as ground truth during testing. The system will provide a 5% value of the total length, but this value can be reassigned if needed.
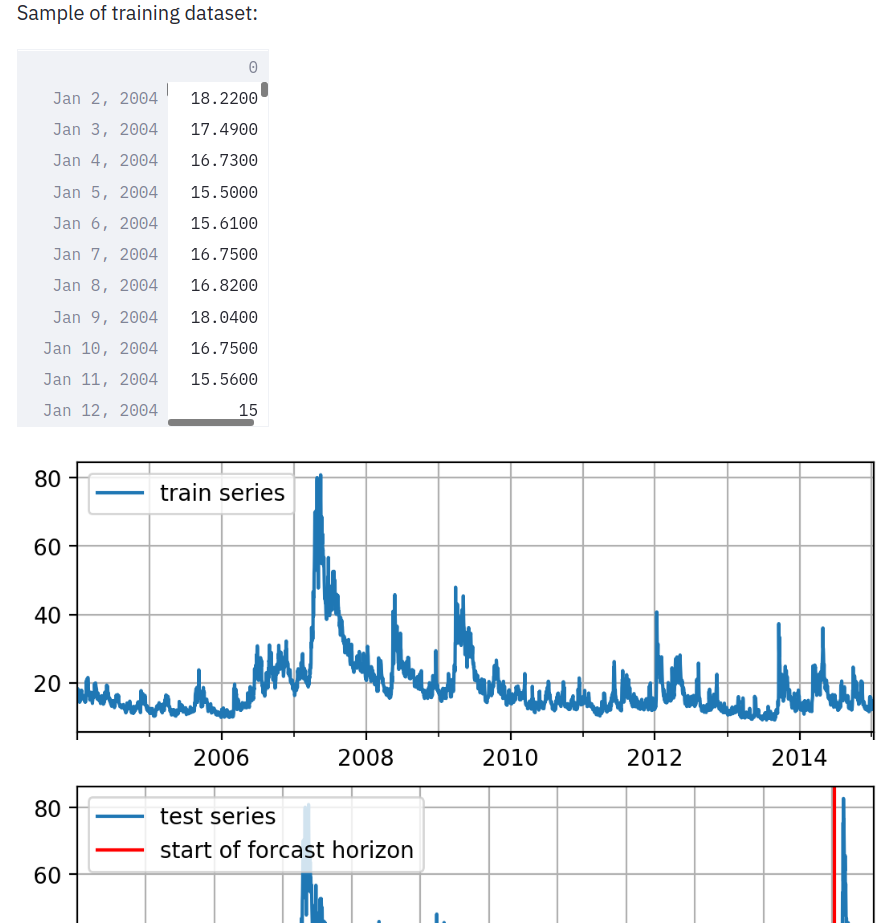
After specifying configurations, the dataset will be presented in dataframes and graphs to help confirm the dataset is properly set up.
- Choose a model.
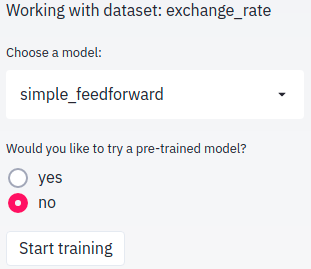
Currently, only two types of models are supported: simple_feedforward and deepar. If you load the demo dataset in the previous step, you can use the pre-trained model by selecting yes directly, without waiting for training or uploading the dataset. After selecting yes, the model will be load automatically.
- Specify hyperparameters, or bring in a pre-trained model.
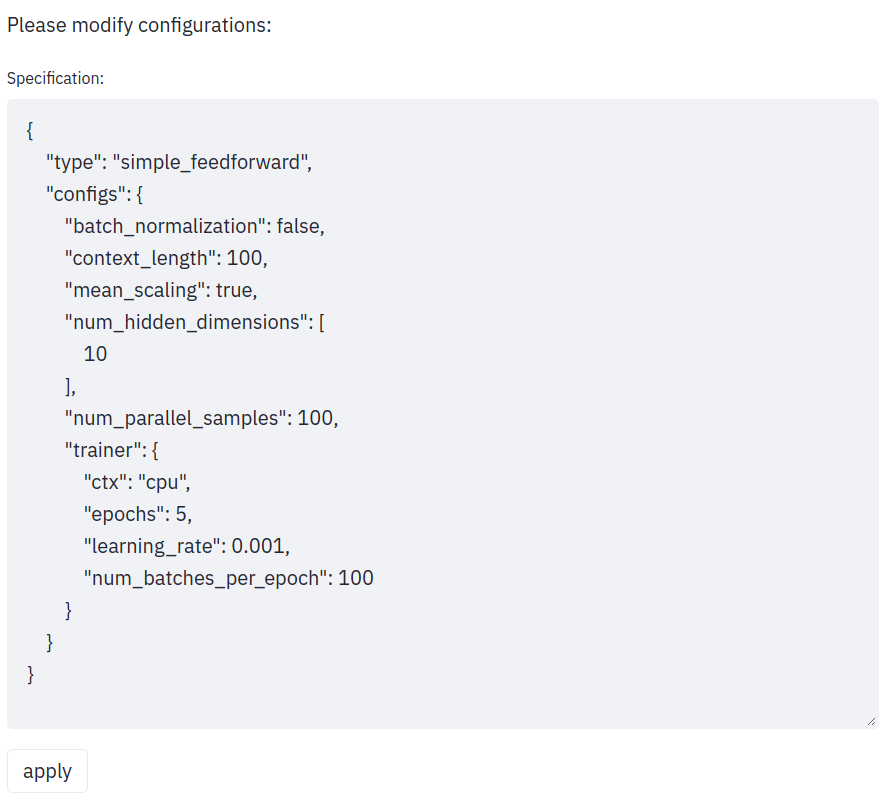
In general, each estimator is configured by a number of hyperparameters that can be either common (but not binding) among all estimators (e.g., the prediction_length) or specific for the particular estimator (e.g., number of layers for a neural network or the stride in a CNN).
For all models: prediction_length and freq are needed.
For simple_feedforward model (for example):
trainer – Trainer object to be used (default: Trainer())
num_hidden_dimensions – number of hidden nodes in each layer (default: [40, 40])
context_length – Number of time units that condition the predictions (default: None, in which case context_length = prediction_length)
distr_output – Distribution to fit (default: StudentTOutput())
batch_normalization – Whether to use batch normalization (default: False)
mean_scaling – Scale the network input by the data means and the network output by its inverse (default: True)
num_parallel_samples – Number of evaluation samples per time series to increase parallelism during inference. This is a model optimization that does not affect the accuracy (default: 100)
The configurations will be provided as a JSON file. Modify it as necessary, then click on "save changes".
There is one example trained model for each type that is ready for quick testing. Simply select yes when prompted to use it, when you load the exchange_rate dataset.
- Start training
Be sure to click the "start training" button to train the specified model.
- Forecast
Forecast the value in the given time series with the given prediction_length.
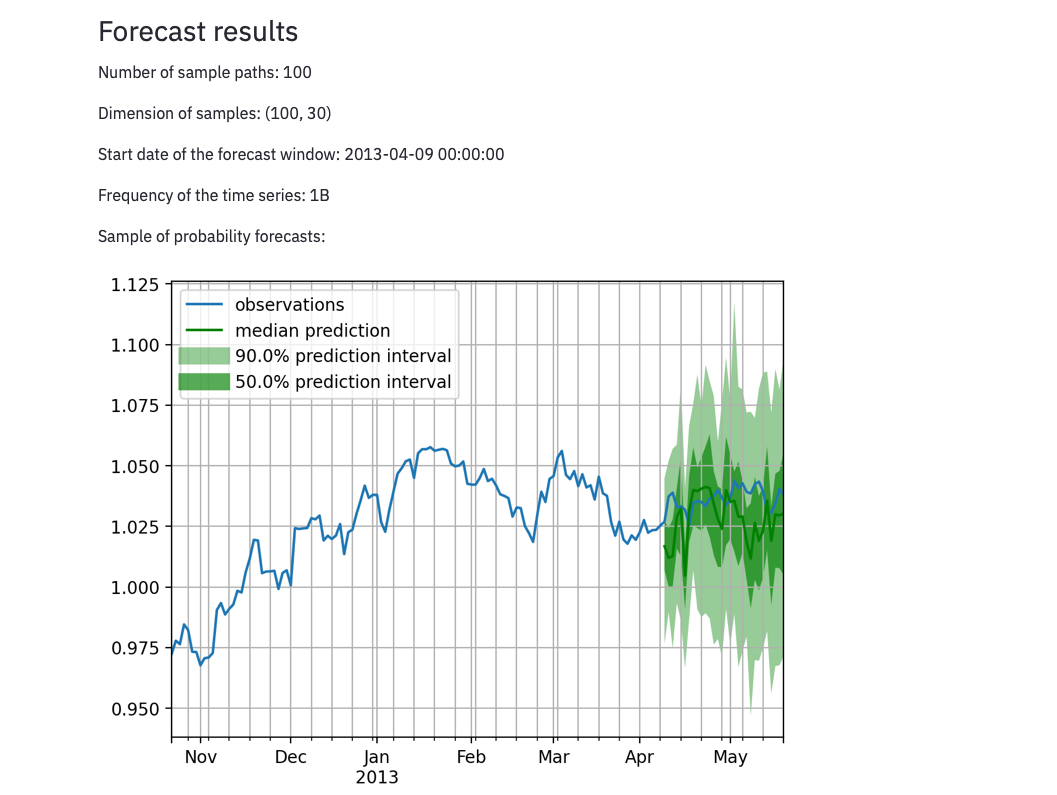
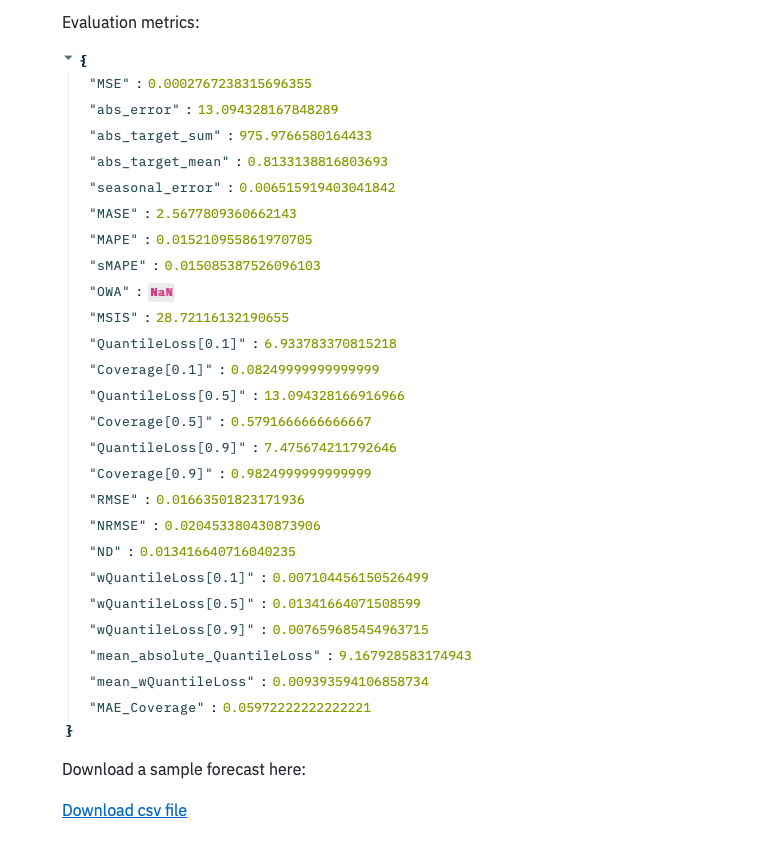
Results will be shown as dataframes, graphs will be given on the prediction. Some evaluations are provided for your reference.
